Editing the background of a photo can dramatically enhance its appeal, whether you’re creating professional content, artistic edits, or just fun photos for social media. With AI Artist Pro, changing the background of any image is easy, thanks to its advanced AI-powered background editing tool. In this guide, we’ll walk you through the process of transforming your photos step by step.
1. Upload Your Photo to AI Artist Pro
The first step is to upload the photo you want to edit. Open the AI Artist Pro app and tap the “Upload” button to select an image from your device gallery. Whether it’s a portrait, group shot, or product image, the app’s AI will analyze and prepare the image for background editing.
Tip: For best results, use high-resolution images with a clear distinction between the subject and the background. This will help the AI accurately detect the subject and make the editing smoother.
2. Select the Background Removal Tool
Once the image is uploaded, navigate to the Background Removal tool, which is found in the app’s main editing toolbar. The AI in AI Artist Pro will automatically detect the subject in the foreground and separate it from the background with precision. This means you don’t have to manually trace the subject – the AI handles it all.
After the background has been removed, you’ll see a transparent backdrop behind your subject, allowing you to easily apply new backgrounds or effects.
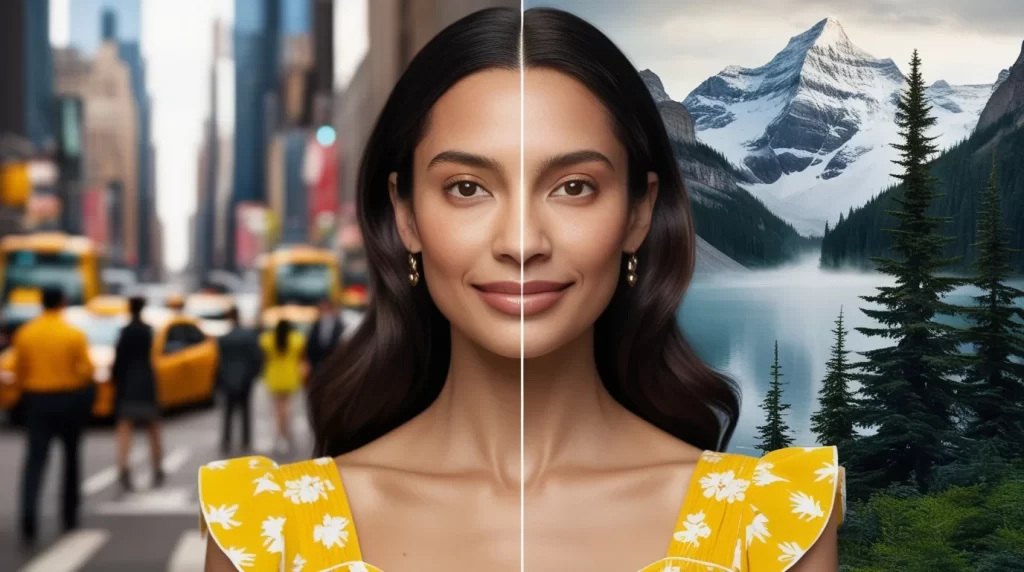
3. Choose or Upload a New Background
With the background removed, you can now replace it with something new. AI Artist Pro offers a variety of pre-installed background options, including nature scenes, urban landscapes, studio backdrops, and more. To add a custom touch, you can also upload your own background images by tapping the “Custom Background” option.
Tip: When choosing a background, try to match the lighting and shadows of your original photo for a more natural look. This helps the subject blend seamlessly into the new environment.
4. Adjust and Customize the New Background
Once the new background is applied, you can further customize its appearance to ensure it fits well with the subject. Use the app’s editing tools to adjust brightness, contrast, and color balance of both the subject and the background. You can also resize or reposition the subject to better match the new scene.
Additionally, the AI Artist Pro app allows you to blur or soften the new background if you want to create a depth-of-field effect, giving your photos a professional finish.
5. Save and Share Your Edited Photo
After you’re satisfied with the background replacement, click the save button to download your newly edited image. AI Artist Pro supports high-resolution downloads, preserving the quality of your edited photos. You can then share the final result directly to your social media accounts like Instagram, Facebook, or Twitter, all from within the app.
Tip: For maximum engagement on social media, consider adding a caption or post text highlighting the editing process and tools you used. This can attract more attention and show off the capabilities of AI Artist Pro!